In some cases, you may want to add gadget above your Blogger blog header. Here are simple steps helping you achieve this task.
Step 1: Sign in to your blog Visit Google Blogspot home page at: http://blogspot.com/ or http://www.blogger.com/ and sign in with your Google account.
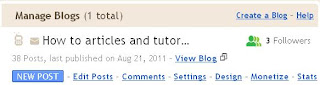
Step 2: Go to your chosen blog Dashboard
A Google account can have many blogs. When you sign in to your blog, you are presented with the main dashboard. You can click any link (NEW POSTs, Edit Posts, etc....) under your chosen blog title to go to the dashboard of your chosen blog.
- Choose Design / Edit HTML.
- Click 'Download Full Template' link to back up your blog template.

- Tick on "Expand Widget Templates" in the Edit Templates tab

- If you use templates such as Simple and Awesome Inc, locate the following code in your blog template
Below this code, locate maxwidgets attribute and set it to 3.

For older Blogger templates such as Sand Dollar, Minima, Thisaway and many custom templates find the code:
<div id='header-wrapper'>
Below this code, locate maxwidgets attribute and set it to 3.
- Click "Save Template" to successfully modify your settings.
Step 5: Move gadget above Blog header
- Go to Design -> Page Elements.
- Now you can move your chosen gadgets above your Blog header.


No comments:
Post a Comment