Adding a donation button to your blog will encourage visitors who enjoy reading the blog's contents to easily support your work by clicking the button to make donations. However, your Paypal account needs to be a Premier or Business one in order to receive the donations from visitors with Credit/ Debit cards.
It’s free to upgrade your Payal Personal account to Premier or Business. However, a Personal account can send and receive mony free of charge while a Premier or Business account has to pay a small fee to receive payments.
It’s easy to create a donation button via Paypal. This article will outline simple steps to create a Paypal donate widget button and add it to your blogger blog.
Step 1: Sign in to your Paypal account
Visit Paypal home page at: http://paypal.com and sign in with your Personal/ Premier/ Business account. In the home page of your Paypal account click the ‘Merchant Services’ tab.
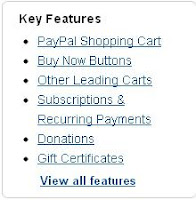
In the ‘Key Features’ box click the ‘Donations’ link.

Step 2: Get Donate button widget code
Step 3: Add Paypal Widget to your blog

Step 2: Get Donate button widget code
In the 'Create PayPal payment button' window:
- Choose Donations in the 'Choose a button type' combo box.
- Depend on your needs you can choose to customize your Donate button by clicking the 'Customize text or appearance' link.
- Choose the currency you wish to receive in the 'Currency' combo box.
- Tick the ‘Use my secure merchant account ID’ radio button to cloak your email address from spam bots.
- You can save your buttton for future use by clicking 'Step 2: Save your buttons (optional)' link.
- Click the 'Create Button' for Paypal to create the widget code.
- Copy the generated code under the Website tab by right clicking and choosing copy.
Step 3: Add Paypal Widget to your blog
- Sign in to your Blogger blog and go to the dashboard.
- Choose Design / Page Elements / Add a Gadget. In basic category, choose HTML-Javascript gadget.
- Paste the code generated by Paypal (in step 2 above) to the content. Add a "Support my blog” title or something like that if you want. Press Save button.
- Now you have successfully added a donate button to your Blog!


No comments:
Post a Comment