Easy navigation is the heart of any website. Navigation menu below the top of the blog header allows visitors easily navigate your blog. Here are simple steps helping add an advanced horizontal navigation menu to your Blogger blog.
Step 1: Sign in to your blog Visit Google Blogspot home page at: http://blogspot.com/ or http://www.blogger.com/ and sign in with your Google account.
Step 2: Go to your chosen blog Dashboard
A Google account can have many blogs. When you sign in to your blog, you are presented with the main dashboard. You can click any link (NEW POSTs, Edit Posts, etc....) under your chosen blog title to go to the dashboard of your chosen blog.

Step 3: Add Custom CSS to your blog

Step 3: Add Custom CSS to your blog
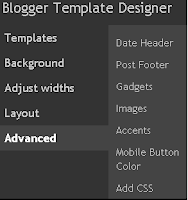
- Choose Design / Template Designer / Advanced / Add CSS.
- Download, copy, and paste this CSS code to "Add Custom CSS" tab. Click "Apply to Blog" button to add your custom CSS.
Step 4: Add An advanced Horizontal menu to your blog
- Choose Design / Page Elements / Add a Gadget.
- In basic category, choose HTML-Javascript gadget.
- Paste the HTML standard hyperlink to the content.
<div id='horizontal_menu'>
<ul>
<li><a href=" your-blog-url-address">Home</a> </li>
<li><a href=" your-blog-url-address/search/label/Label-Name"> Label Name </a></li>
<li><a href=" your-blog-url-address/search/label/Label-Name"> Label Name </a></li>
<li><a href=" your-blog-url-address/search/label/Another-Label Name">Another Label Name </a></li>
</ul></div>
- Type "Navigation menu" in the title textbox or something like that if you want. Press Save button.
- Drag the just created "Navigation menu" gadget under your blog header.
- Now you have successfully added an advanced horizontal navigation menu to your Blog!


No comments:
Post a Comment